EmStat Pico Firmware Update
This document showcases how to upgrade the firmware of a separate EmStat Pico module using these files. This does not apply to the EmStat Pico dev board or other end user products made by PalmSens. This document will describe two different ways of updating firmware, manual and automatic (using PSTrace).
Automatic update using FTDI UMFT234XD module
Automatic updates are the easiest way to update the EmStat Pico firmware. However, only EmStat Pico’s connected to an FTDI UMFT234XD module are supported. If using a different serial to USB converter or communicating directly to the EmStat Pico using UART, please refer to the section Manual firmware update.
Hardware connections
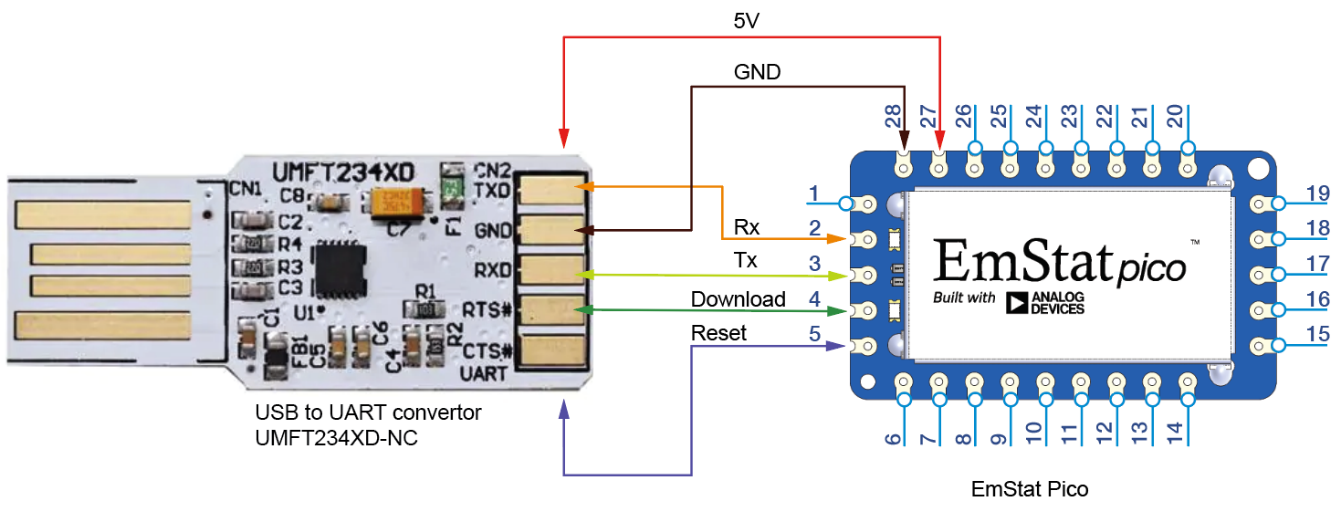
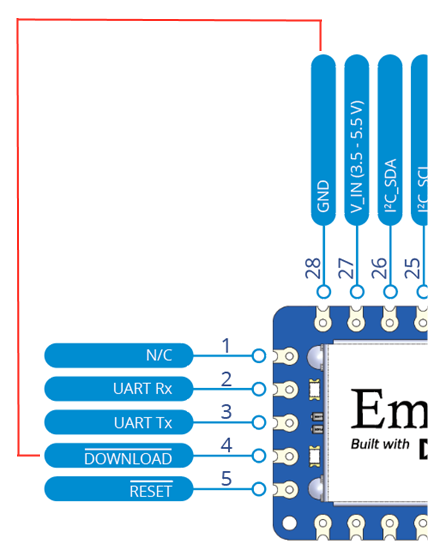
To enable PSTrace to put the EmStat Pico into bootloader mode automatically, the "RESET" and "DOWNLOAD" pins need to be connected to the FTDI module. The RTS pin should be connected to the "DOWNLOAD" pin and the CBUS0 pin should be connected to the "RESET" pin. See "Figure 1: Hardware Connections".
Configuring the UMFT234XD
The FTDI UMFT234XD module needs to be configured to work correctly with PSTrace. This can be done automatically by running "Program ESPicoUSB stick FTDI UMFT234XD.bat", included with this document. Make sure only one FTDI device is connected to the PC before running this batch file.
FT_Prog can also be used manually, in which case the following values should be modified:
-
Ensure "Hardware Specific → Invert RS232 Signals → Invert RTS#" is off.
-
Set "Hardware Specific → CBUS Signals → C0" to GPIO.
-
Set "USB String Descriptors → Product Description" to "ESPicoUSB". This is important for PSTrace so that it can recognize the type of device that is connected.
-
Set "Hardware Specific → Port A → Driver" to "Virtual COM Port".
Uploading firmware through PSTrace
Once the device FTDI module is configured, the firmware can be updated in PSTrace using the following steps:
-
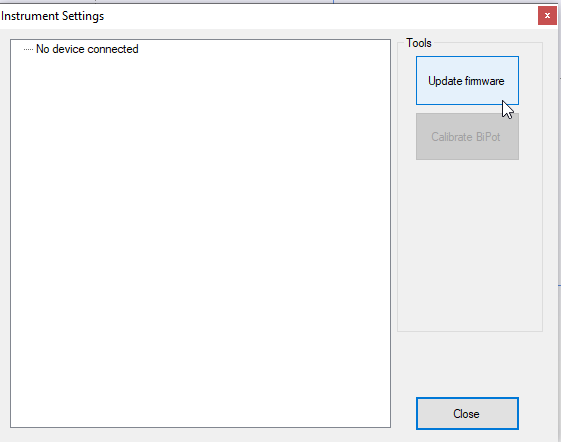
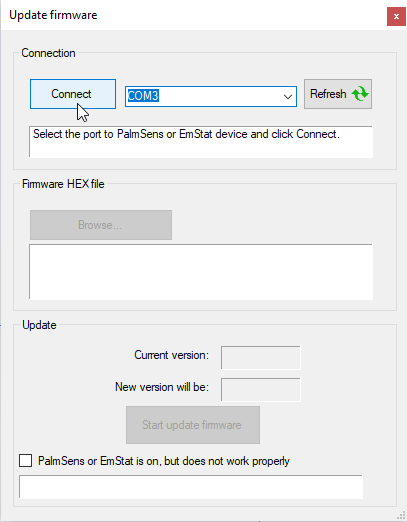
Go to the "Update firmware window", see "Figure 2" and "Figure 3".
-
Select your device in the connection drop down and press "Connect". See "Figure 4".
-
PSTrace should have automatically selected the firmware provided with this version of PSTrace. If you wish to change the firmware, this can be done using the "Browse…" button.
-
Press the "Start update firmware" button.

Manual firmware update
Manual firmware updating is required when not using PSTrace and/or the supported FTDI module. The EmStat Pico must be set to bootloader mode manually. The executable "EsPicoProgrammer.exe" can then be used to upload the firmware. The .NET Framework 4.6.1 is required to run this executable.
The firmware files for the EmStat Pico module can be found in the section "Downloads" of the EmStat Pico’s website.
Entering bootloader mode
To enter bootloader mode, the "DOWNLOAD" pin must be held at "GND" during the startup of the EmStat Pico. To achieve this, the "GND" pin can be connected to the "DOWNLOAD" pin before powerup. The "RESET" pin can also be pulled to GND for at least 10 ms to reset the device while the "DOWNLOAD" pin is pulled to "GND". See figure "Figure 5" for the pinout of the EmStat Pico. If the device has successfully entered boot mode, the blue LED will blink.
Uploading firmware using "EsPicoProgrammer.exe"
The "EsPicoProgrammer.exe" executable can be used to program firmware, settings or licenses onto the EmStat Pico. To upload firmware use the following command:
EsPicoProgrammer.exe -upload_fw file port (1)(2)
| 1 | file: The path to the firmware binary. |
| 2 | port: The COM port of the EmStat Pico. |
Example:
EsPicoProgrammer.exe -upload_fw "EmStatPico_fw_1_1.bin" COM26
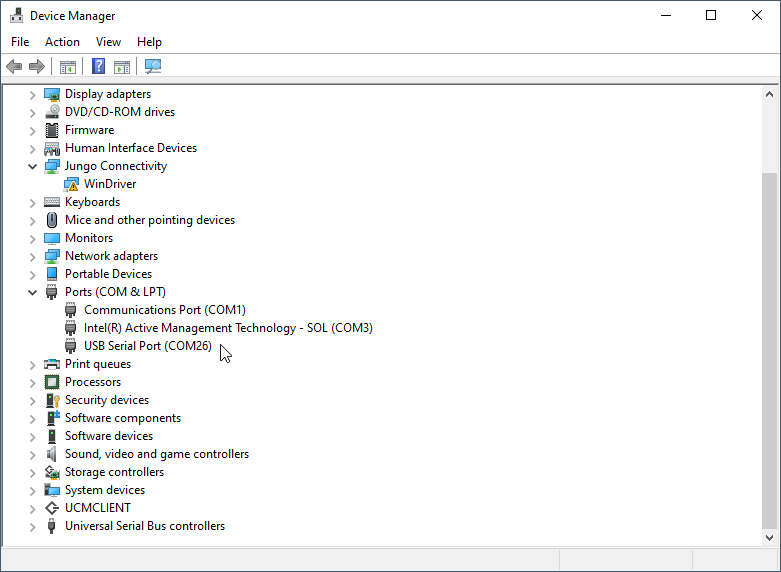
To find the com port of the EmStat Pico open the "Device Manager" and look for your device under "Ports (COM & LPT)" as shown below in "Figure 6".
See the folder "EsPicoProgrammerSource" for the source code of EsPicoProgrammer.exe. The EsPicoProgrammer project uses "Visual Studio 2019".