Development Kit Bluetooth Module
The EmStat Pico devboard has an integrated Bluetooth module that can be used to wirelessly communicate with the device from a PC, tablet or smartphone. This section describes how to use the Bluetooth capabilities on the EmStat Pico development board.
Hardware Configuration
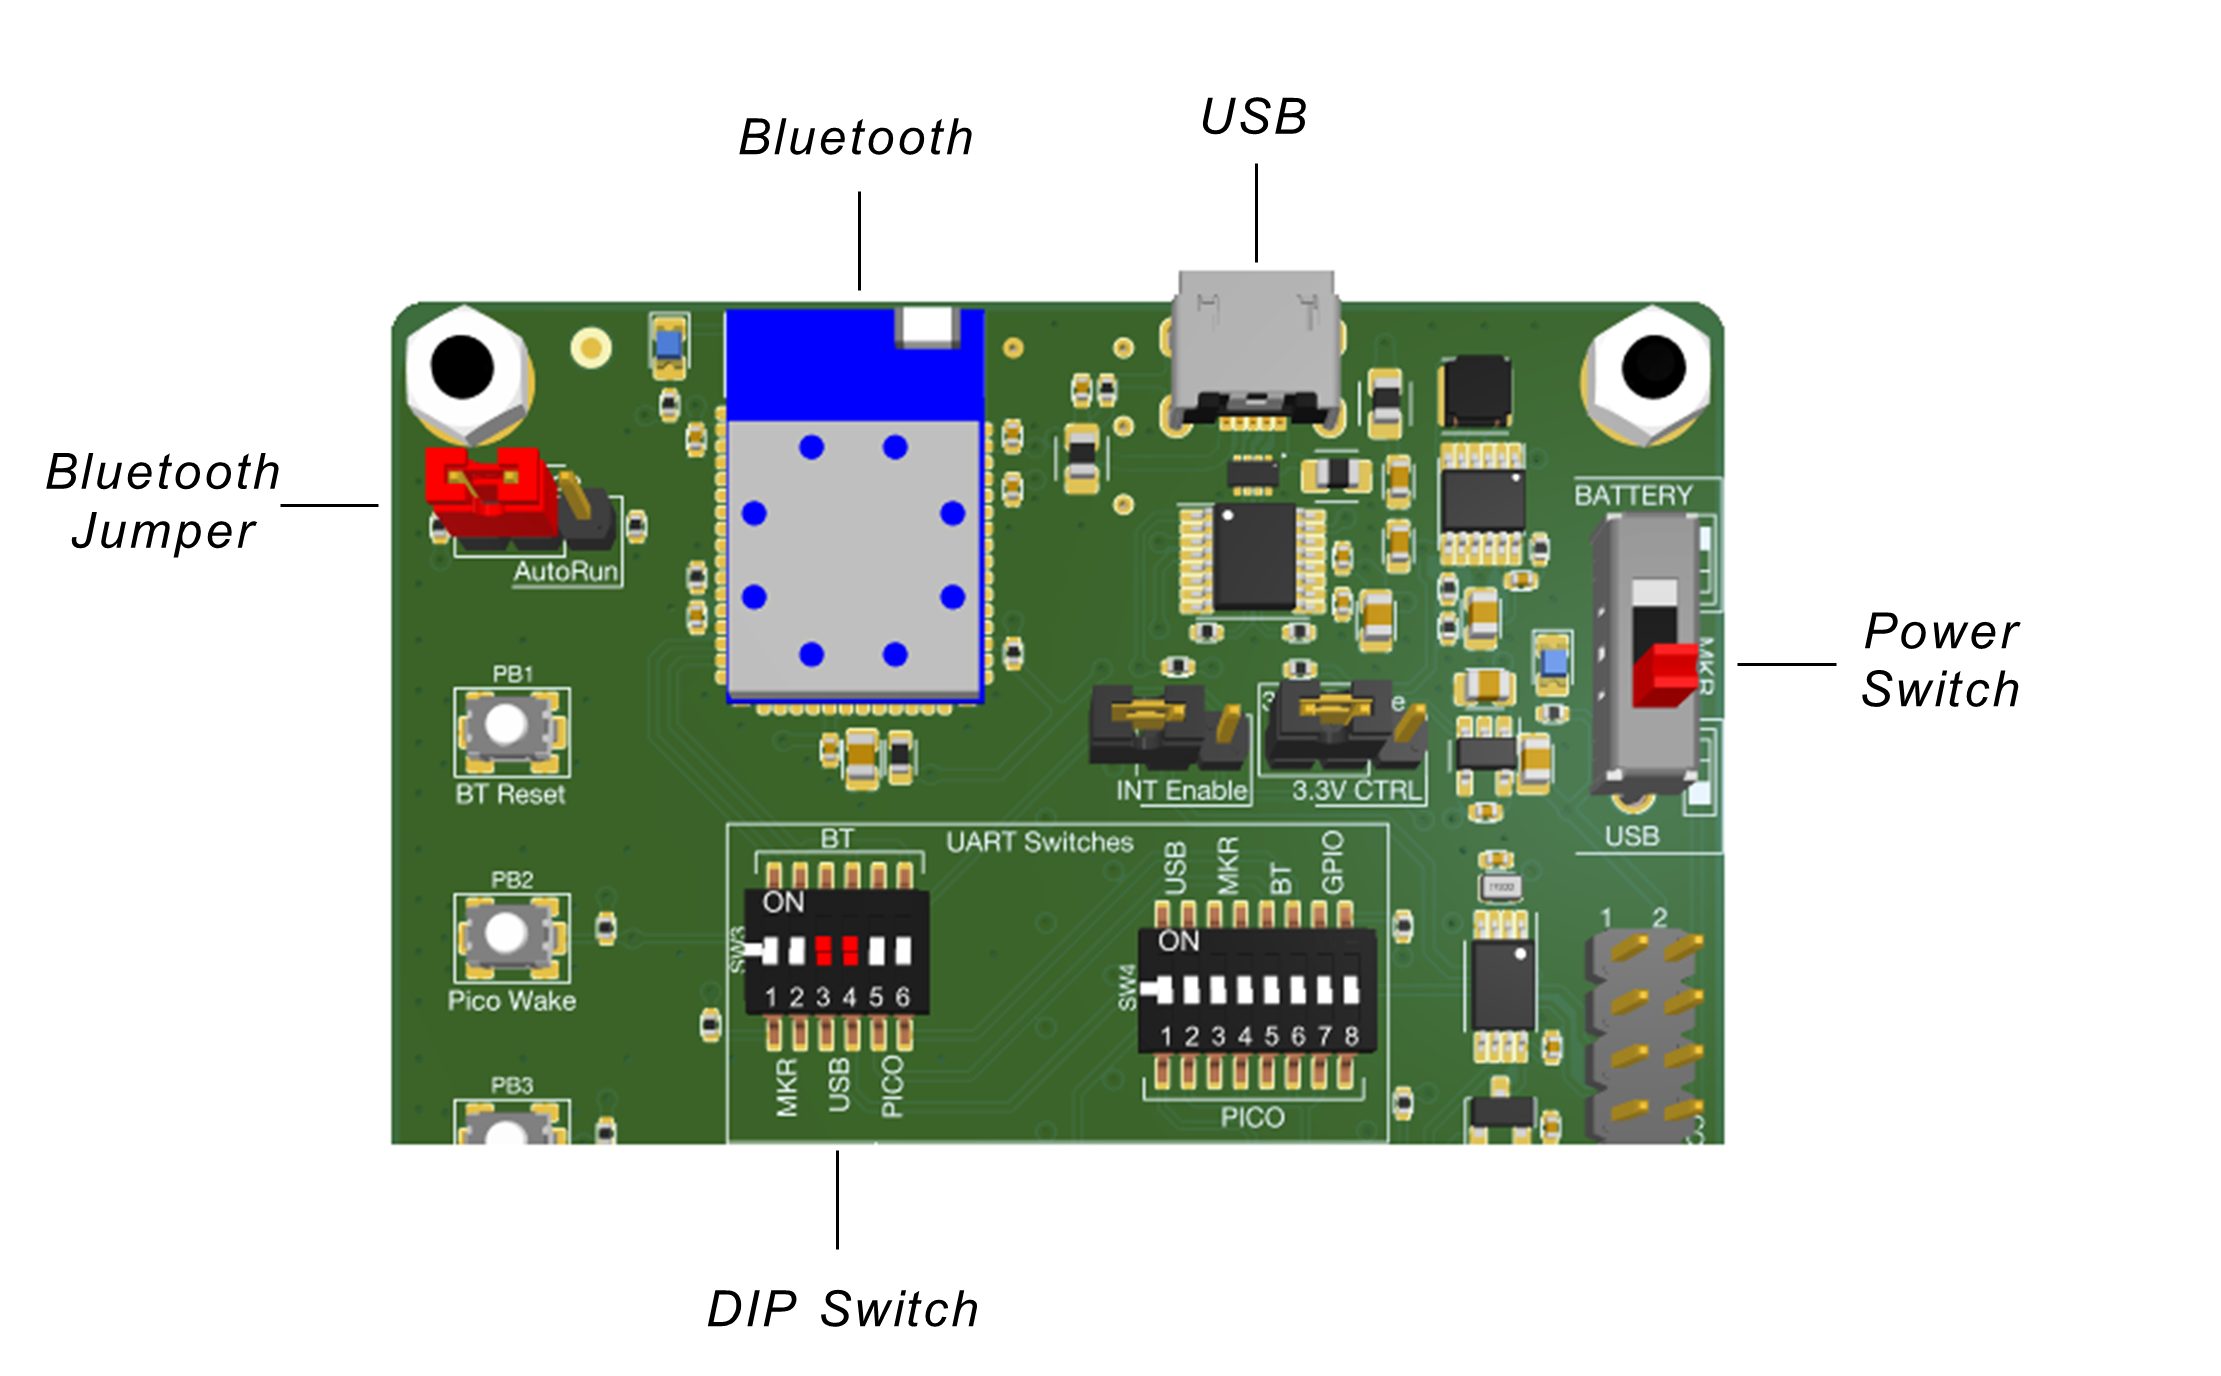
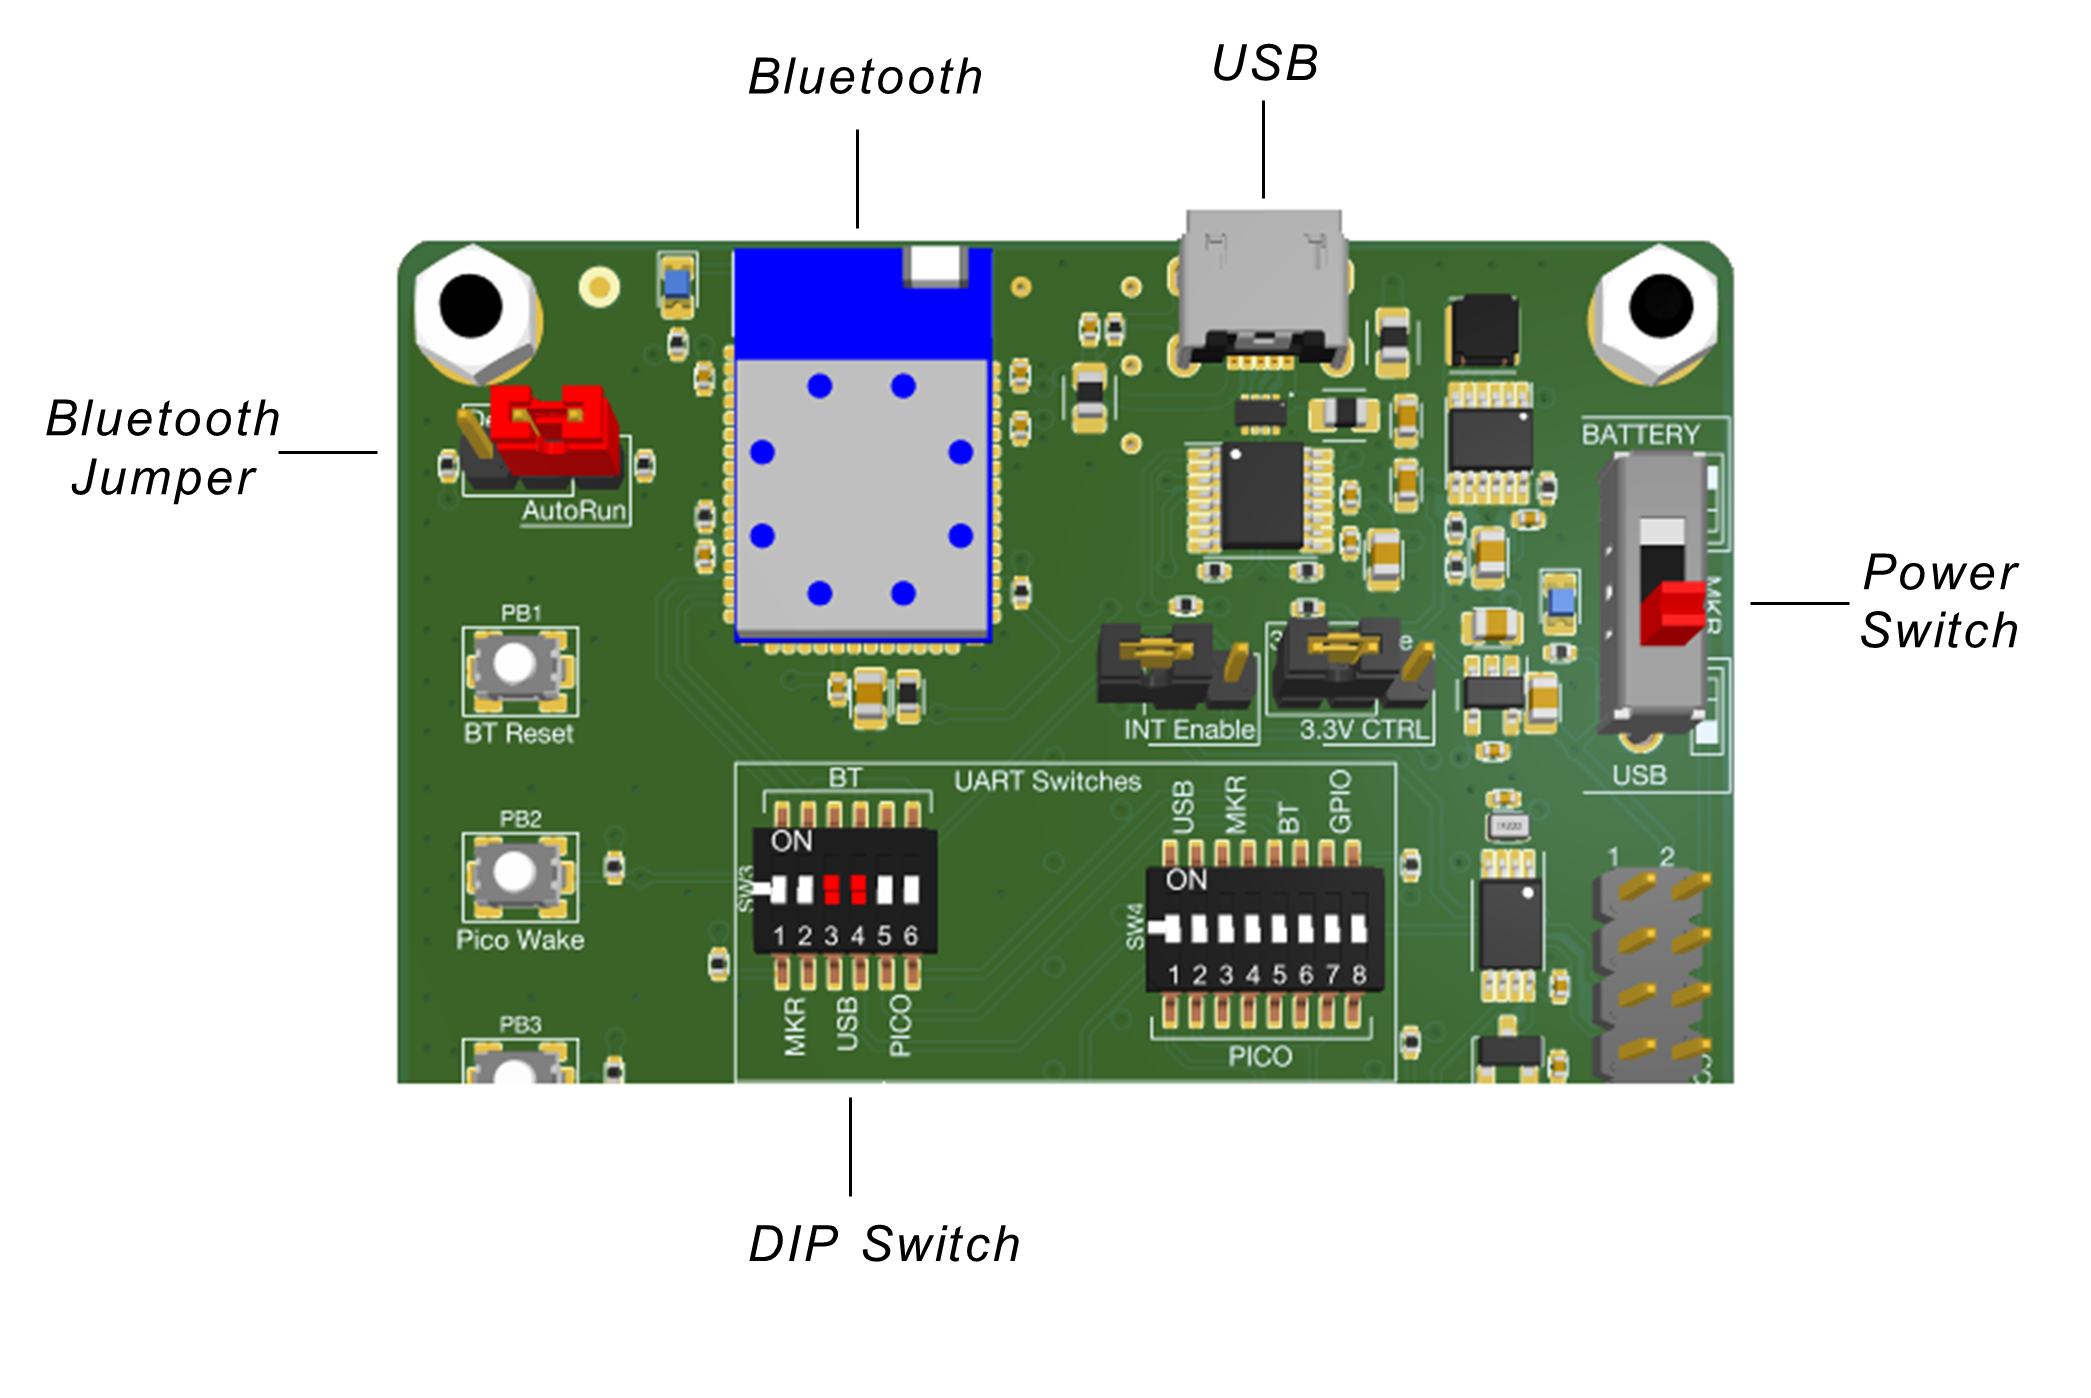
The EmStat Pico development board utilizes two DIP switches to select how the communication lines are connected. The top switch (SW3) is responsible for connecting the Bluetooth module to any of the supported interfaces. The bottom switch (SW4) works the same for the EmStat Pico. These switches should only be set to communicate with one interface at a time and the top and bottom switches must not connect to the same interface. Because of this switching architecture both switches have to be set to the right settings to connect the Pico and Bluetooth module together. The required configuration is shown below.
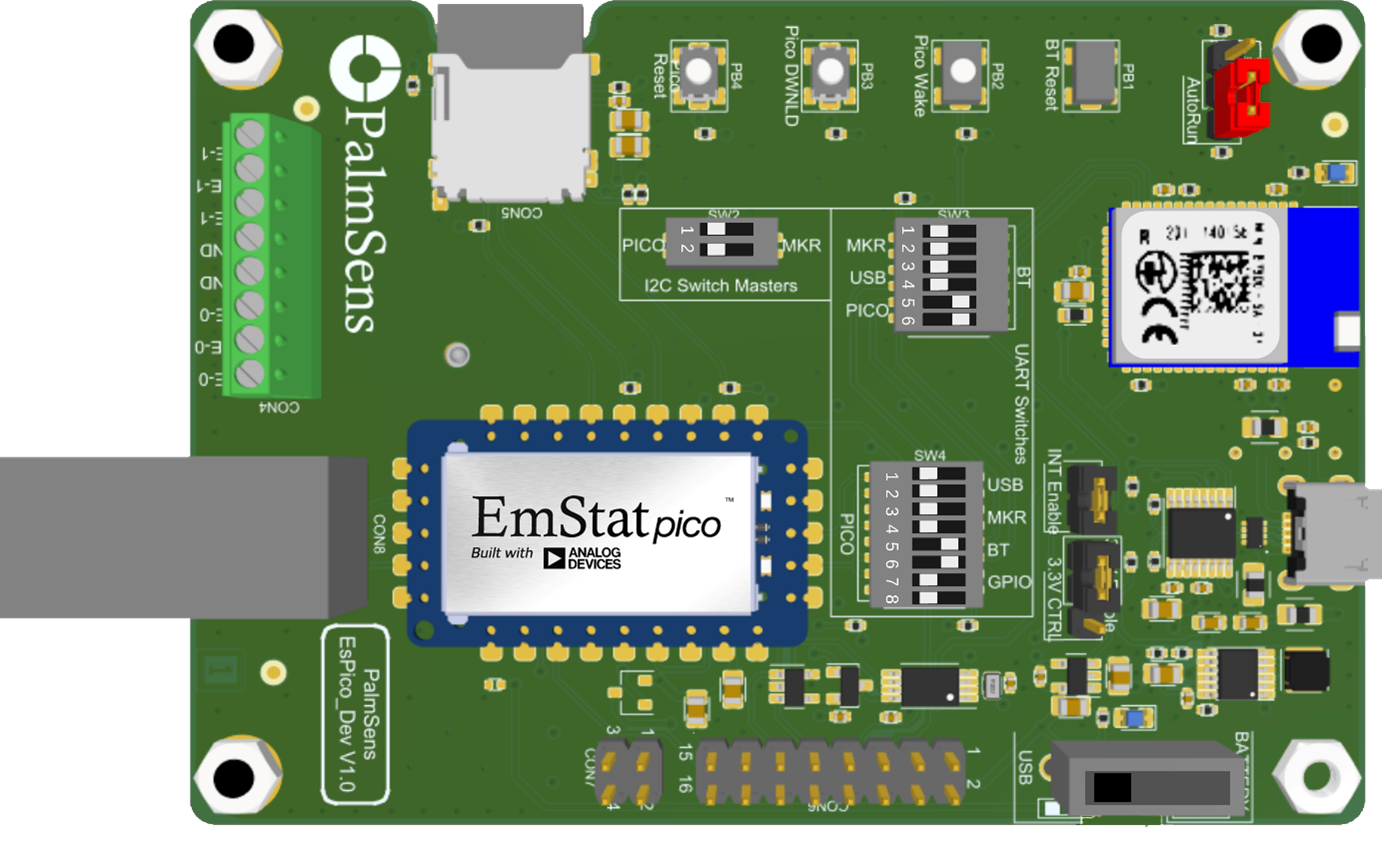
Note that the switches are “on” when the slider is set to the right. For SW3 only slider 5 and 6 should be in the “on” position. SW4 should have sliders 5 and 6 enabled. Also the 3V3 should be enabled. The last step is to set the top jumper to “AutoRun” (bottom position). By default the Bluetooth module is configured to use Classic Bluetooth. If BLE is required a new script has to be uploaded. See Development Section for more information about loading scripts.
Connecting PSTrace
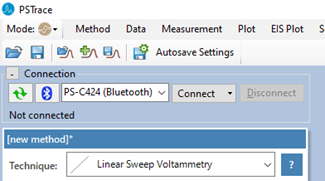
PSTrace has to search for Bluetooth devices before it can connect to them. Click the Bluetooth icon under “Connection” to perform this action. When it is finished it should list the device in the dropdown list. The name has the format “PS-xxxx” where xxxx is the last digits of the Bluetooth MAC address. (This MAC address can be found on the sticker of the Bluetooth module between the QR-code and “CE” logo).
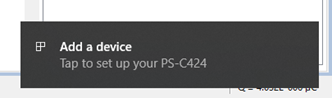
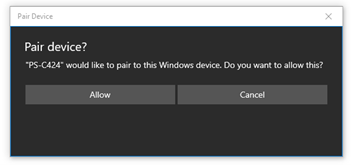
The first time PSTrace connects with an new device Windows 10 and 11 show a pop-up message in the right bottom corner of the screen. Click on this message and allow Windows to pair the device.
Connecting PSTouch (Android)
The process of connecting the EmStat Pico dev board in PSTouch is similar to PSTrace. In PSTouch click on the wireless symbol.

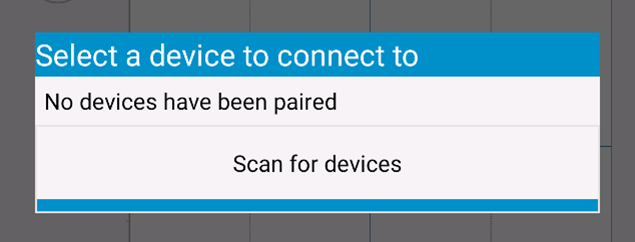
This will open a pop-up window that lists the previous discovered devices. Click “scan for devices” to fill this list.
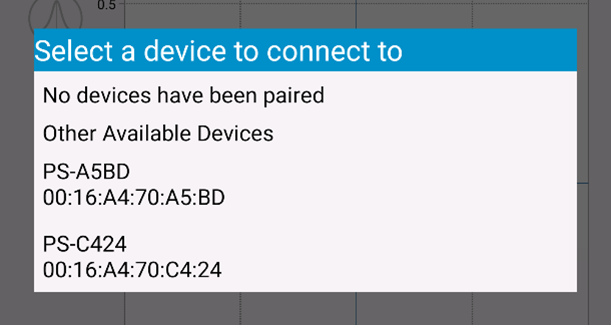
When this is finished the EmStat Pico should show up as “PS-xxxx” where xxxx is are the last 4 digits of the Bluetooth MAC address. (This MAC address can be found on the sticker of the Bluetooth module between the QR-code and “CE” logo). Click the device name and allow Android to pair to the device.

Bluetooth Development Mode
The EmStat Pico development board uses the Laird BT900 module for Bluetooth communications. The Laird BT900 Bluetooth module can be set in a Development Mode to allow for changing the smartBASIC script running on it. SmartBASIC is a scripting language from Laird, the manufacturer of the Laird BT900 Bluetooth module. For more information, see: BT900 Series Bluetooth Module | Laird Connectivity
Board settings
To interact with the Bluetooth module directly the following settings on the Emstat Pico development board have to be set. All board settings needed for these steps are illustrated in RED.
-
The middle two switches (3, 4) on SW3 need to be set in the ON position (Top).
-
The jumper needs to be on the left two positions underneath the text “Dev Mode”.
-
Connect the USB cable to the USB connector
-
Power-up the board by settings the power switch to USB (bottom)
Using the Dual Mode script from PalmSens
PalmSens has developed a script for using the Bluetooth module in Dual Mode. This means that it will identify itself as a classic Serial Port Profile (SPP) Bluetooth device and as a Bluetooth 4.0 or Bluetooth LE (BLE) device. The host (PC, mobile or other Bluetooth enabled device) can choose to connect via SPP or BLE. The latter allows for connecting with an iOS app for example. The BLE settings used in our Dual Mode script are based on the VSP Application Note from Laird, which can be found here: BT900 Series Bluetooth Module Documentation
To easily update your device to the dual mode smartBASIC we have developed a simple tool to update your device. The tool works with:
-
EmStat Pico development board.
-
Sensit BT (SNS and SPE)
-
EmStat GO
The tool works simply by selecting which device you have connected to your PC via USB and clicking the “UPLOAD SCRIPT”-button. You can download the tool here: www.palmsens.com/ps-laird-bt900-upgrade-tool
Using your own custom smartBASIC script
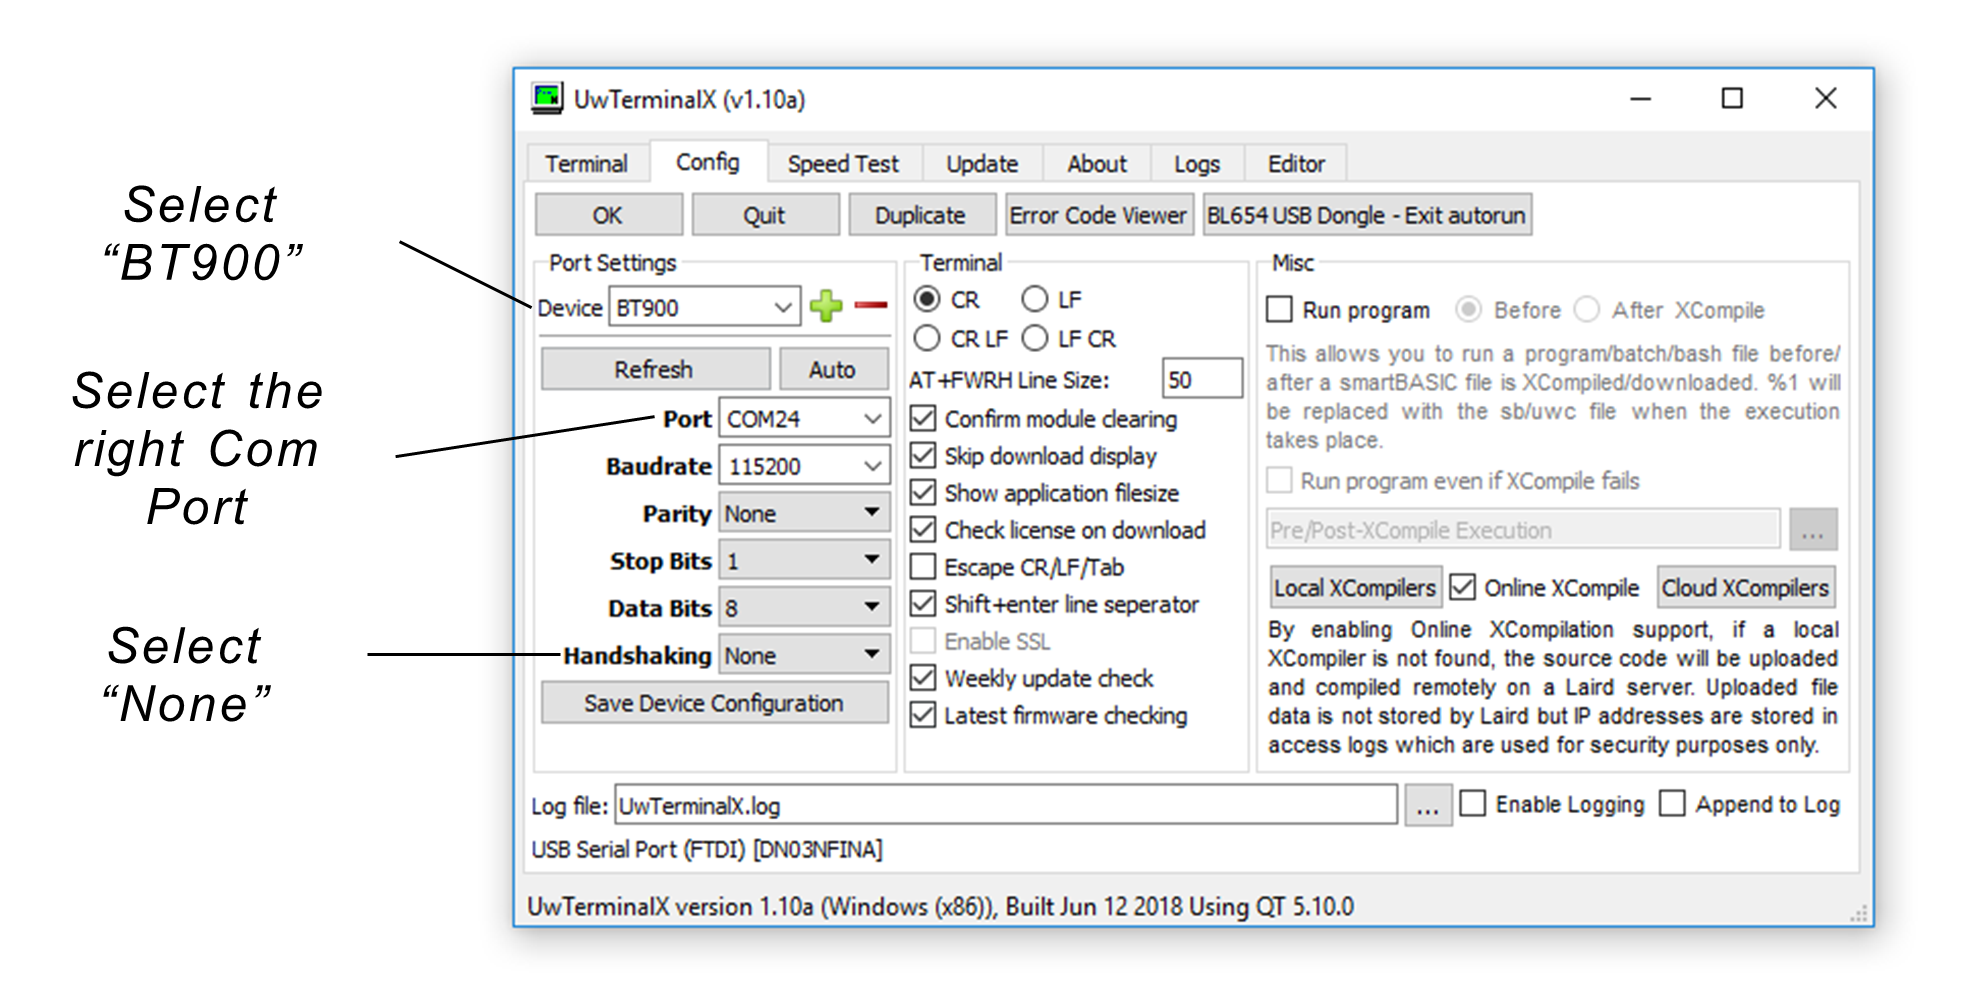
In case you would like to use your own smartBASIC script for the Laird BT900 module, you can set the device in “Bridge Mode” using the Programmer tool as described in the previous section. When the device is in Bridge Mode you can directly access the BT900 module via a COM port. You can download the tools to update the BT900 module using UwTerminalX from the Laird website. See for more information: BT900 Series Bluetooth Module Documentation
When using UwTerminalX from Laird, please make sure to set the following settings:
Bluetooth AutoRun Mode (Standalone Mode)
In this mode the script that has been uploaded to the Bluetooth module is executed on power-up of the development board. Now, every time the board powers up the script will autorun and no more actions are needed to work with the Bluetooth.
Board Settings
When the desired script has been uploaded to the Bluetooth module, AutoRun can be set. This will enable the Bluetooth to run the set script when the device is powered on. The following setting on the Pico Development board have to be made. All board settings needed for these steps are illustrated in RED.
-
The middle two switches 3, 4 on SW3 need to be set in the ON position (Top)
For other configurations :-
Arduino MKR : Switches 1, 2 on SW3 need to be set in the ON position (Top) to connect to the Arduino MKR

-
Emstat Pico : Switches 4, 5 on SW3 and 5,6 on SW4 need to be set in the ON position (Top) to connect to the Emstat Pico.

-
-
The Jumper needs to be on the right two position above the Text “AutoRun”
-
Connect the USB cable to the USB connector
-
Power-up the board by settings the power switch to USB (bottom)